LogoLogo
  • Welcome!
  • Mission Statement
  • Contributing Guidelines
    • Embed CADs in Wiki Articles
  • VEX Worlds Livestream Archive
    • VEX U
    • V5RC High School
    • V5RC Middle School
    • VIQRC Middle School
    • VIQRC Elementary School
    • JROTC
  • ⚙️Hardware
    • Design Fundamentals
      • Gear Ratios
      • Internal Forces (Stress)
      • Torque
      • RPM
      • Center of Mass
    • Introduction to VEX Parts
      • Structure
        • C-Channels and Angles
        • Fasteners
        • Retainers
        • Gussets and Brackets
        • Bearings
        • Plate Metal and Flat Bars
      • Motion
        • High Strength Components
        • Gears and Sprockets
        • Traction Wheels
        • Mecanum Wheels
        • Omnidirectional Wheels
        • Flex Wheels
    • Robot Decorations
      • Part Dyeing
      • Metal Coloring
      • License Plate Holders
    • Lifts
      • Double Reverse Four Bar (DR4B or RD4B)
      • Four Bar
      • Scissor Lift
      • Six Bar
      • Other Lifts
      • Best Practices
    • Shooting Mechanisms
      • Catapult
      • Flywheel
      • Linear Puncher
    • Drivetrains
      • Tank Drive
      • Mecanum Drive
      • Holonomic Drive
      • Designing a Drivetrain
      • Best Practices
    • Pivots & Joints
    • Pneumatics
      • Best Practices - Pneumatics
    • Intakes
    • Flip Out Mechanisms
    • Defensive Mechanisms
    • Misc. Building Techniques
    • VexU
      • Common Manufacturing Techniques
        • 3D Printing
        • Laser Cutting
      • Custom Manufactured Parts Library
      • Commercial Off The Shelf Parts Library
  • 👑Team Administration
    • New Team Resources
      • Creating The Team
      • Gaining Interest for Robotics Teams
      • Attending Competitions
        • Elimination Bracket
    • Team Dynamics
      • Organization Structure and Longevity
      • Member Allocation and Management
      • How *Not* To Run a Team
    • Team Finances
      • One-Year Team Financial Breakdown
      • Funding Your Teams
    • Hosting Competitions
      • Live Streaming
      • Tournament Manager
        • Competition Electronics
        • Creating a Tournament
        • Tools
          • Field Set Control
          • Connecting Mobile Devices
          • Connecting Raspberry Pis
        • Match Control
          • Inputting Match Scores
          • Inputting Skills Scores
          • Inputting Scores on TM Mobile
        • Displays
        • Alliance Selection
      • Additional Event Partner Resources
    • VexU Organization Management
      • Getting Started in VexU
      • Team / Personnel Management
      • Volunteering At Local Events
  • 📚The Judging Process
    • The Engineering Design Process
      • Test and Refine
    • The Engineering Notebook
      • Segments of the Notebook
      • BLRS2 '23-'24 Engineering Notebook
      • Integrating Inventor Models into Documentation
      • Engineering Notebook Rubric Breakdown
    • The Interview
      • Interview Rubric Breakdown
    • Using Notion for an Engineering Notebook
      • How to Setup a Notebook
      • How to Create Entries
      • How to Export a Notebook
      • Purdue SIGBots Notion Template
        • Game Analysis
        • Identify The Problem
        • Brainstorm Solution
        • Select Best Approach & Plan
        • Build Log
        • Programming Log
        • Testing Solution
        • Tournament Recap
        • Innovative Feature
  • 🖥️VEX CAD
    • CAD Programs
      • Inventor
      • Fusion 360
      • Solidworks
      • OnShape
      • Protobot
    • Making a Chassis
      • Inventor Chassis: The Basics
        • Installation
        • User Interface Overview
        • Dark Mode
        • Assemblies
        • Placing Parts
        • Navigating CAD
        • Changing Visual Style
        • Grounding
        • Connecting Two C-Channels
        • Modifying Existing Constraints
        • Toggling Visibility on Existing Parts
        • Completing Half of the Chassis
          • Inner Drive Channel
          • Bearing Flats
          • Motors
          • Wheels
          • Sprockets
          • Spacers, Washers and Standoffs
          • Spacers Cont.
        • Creating Mid-Plane
        • Mirroring
      • Inventor Chassis: Best Practices
        • File Structure
        • Subassemblies
        • Wheel Subassembly
        • Origin Planes
        • Cross Brace
        • Drive Channels
        • Simple Motor iMates
        • Replacing Simple Electronics
        • Completing Half of the Drive
          • Bearing Flats (Best Practice)
          • Wheels
          • Powered Gear
          • Spacer Boxing
          • Spacers, Washers and Standoffs (Best Practice)
        • Model Browser Folders
        • Mirroring (Best Practice)
        • Model Browser Folder (Right)
        • Main Assembly
      • Fusion 360 Chassis
      • Solidworks Chassis, Chain, and Custom Plastic
    • Remembering The Best
      • 62A Skyrise
      • 400X Nothing But Net
      • 2587Z Nothing But Net
      • 365X Starstruck
      • 62A In The Zone
      • 202Z In The Zone
      • 5225A In The Zone
      • 169A Turning Point
      • 929U Turning Point
      • 7K Tower Takeover
      • 5225A Tower Takeover
      • 62A Change Up
    • Scuff Controller
  • 💻Software
    • Odometry
    • Path Planning
    • Robotics Basics
      • Arcade Drive
      • Tank Drive
      • Joystick Deadzones
      • Curvature (Cheesy) Drive
      • Subsystem Toggling
    • Organizing Code
      • Code Style
      • Code Styling Guide
      • Writing Good Comments
      • Version Control
    • Control Algorithms
      • Bang Bang
      • PID Controller
      • Basic Pure Pursuit
      • Flywheel Velocity Control
      • Kalman Filter
      • Take Back Half (TBH) Controller
      • RAMSETE Controller
    • Competition Specific
      • Operator Control
      • Autonomous Control
    • C++ Basics for VEX Robotics
      • Basic Control Flow
      • Enumerations
      • Namespaces (::)
      • Multiple Files (C/C++)
    • VEX Programming Software
      • PROS
        • OkapiLib
      • vexide
      • Robot Mesh Studio (RMS)
      • EasyC
      • RobotC
      • VEXcode
      • Midnight C
    • General
      • Stall Detection
      • Register Programming
      • Sensors and Odometry in Autonomous
      • Embedded Programming Tips
      • Debugging
      • Bit Shift
      • Bit Mask
      • Autoformatting
      • Finite State Machine
      • Data Logging
    • Object Recognition
      • Red Green Buoy
      • AMS
      • OpenCV
      • OpenNI
    • 🤖AI in VRC: Pac-Man Pete
  • ⚡VEX Electronics
    • V5 ESD Protection Board
    • VEX Electronics
      • VEX V5 Brain
        • V5 Electronics Observations and Issues
      • VEX Controller
      • VEXnet and V5 Robot Radio
      • VEX Battery
      • VEX Motors
    • VEX Sensors
      • 3-Pin / ADI Sensors
        • Encoder
        • Potentiometer
        • Limit Switch
        • Bumper Switch
        • Accelerometer
        • Gyroscope
        • Ultrasonic
        • Line Tracker
        • LED Indicator
      • Smart Port Sensors
        • GPS Sensor
        • Rotation Sensor
        • Vision Sensor
        • Optical Sensor
        • Distance Sensor
        • Inertial Sensor (IMU)
        • 3-Wire Expander
    • V5 Brain Wiring Guide
    • Legacy
      • VEX Cortex
      • Power Expander
      • VEX Motor Controller
      • VEX Cortex Wiring Guide
  • General Electronics
    • General Topics
      • External Boards
        • ASUS Tinker Board S
        • Arduino
        • Beagleboard
        • Leaflabs Maple
        • LattePanda
        • Meadow F7 Micro
        • Netduino
        • ODROID-XU4
        • Pandaboard
        • Raspberry Pi
      • Analog-Digital Converter (ADC)
      • Bit-Bang
      • GPIO
      • I2C
      • Jitter
      • Line Noise
      • List of Tools
      • Output Drive
      • Power Consumption
      • Radius Array
      • Resettable Fuse (PTC)
      • SPI
      • Slew Rate
      • Stalling
      • USART
      • UART
      • 5 Volt Tolerant
      • DC Motor Basics
Powered by GitBook
LogoLogo

This work is licensed under a Attribution-ShareAlike 2.0 Generic License

On this page
  • Single-Bearing Screw Joint
  • Compact Screw Joint
  • Low Strength Axle Joint
  • High Strength Axle Joint
  • Contributing Teams to this Article:

Was this helpful?

Edit on GitHub
Export as PDF
  1. Hardware

Pivots & Joints

Joints are attachment points between components used to create mechanisms based on rotation.

PreviousBest PracticesNextPneumatics

Last updated 11 months ago

Was this helpful?

These are the four most common types of Vex Joints:

  • Single Bearing Screw Joint

  • Compact Screw Joint

  • Low Strength Axle Joint

  • High Strength Axle Joint

Single-Bearing Screw Joint

This is the go-to joint in Vex for low-torque rotation applications. Because it is securely fastened to one of the two components, it effectively halves slop and reduces friction in the process. It also benefits from the round shape of the screw combined with the round interior of the bearing.

Assembly: This joint is assembled by first securing a screw to one component with a keps nut and attaching a bearing to the second component. Then the screw is placed through the bearing and secured with a lock nut.
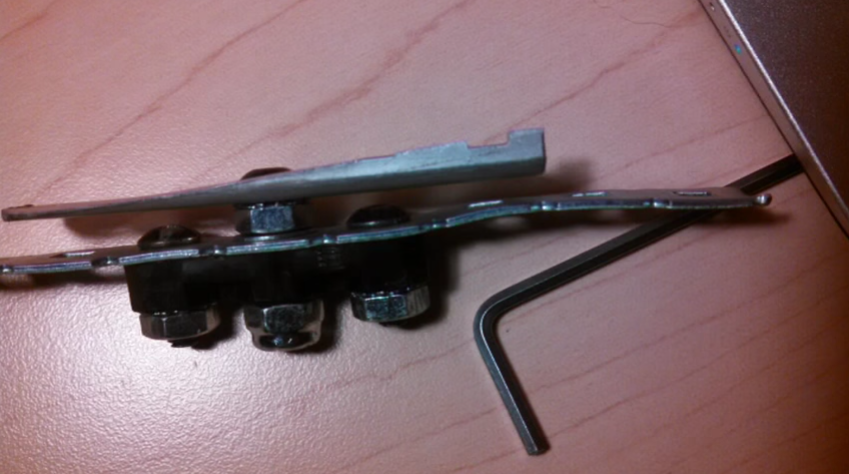
Each of the components can be seen in the model above, which are listed below:

  1. The c-channel that the joint is mounted to, which is typically mounted to the base

  2. The screw that the arm rotates around

  3. The keps nut that fastens the screw to the first c-channel

  4. The c-channel that is rotating

  5. The bearing mounted to the rotating c-channel, which reduces the slop of the rotating c-channel around the screw

  6. The lock nut that prevents the rotating c-channel from coming off of the screw, but is not tightened down to allow the rotating c-channel to spin freely

Examples:
Compact Screw Joint

This is a high-slop joint which is effective in applications that require compactness. If there is room for a single bearing screw joint, however, the single bearing screw joint is preferable.

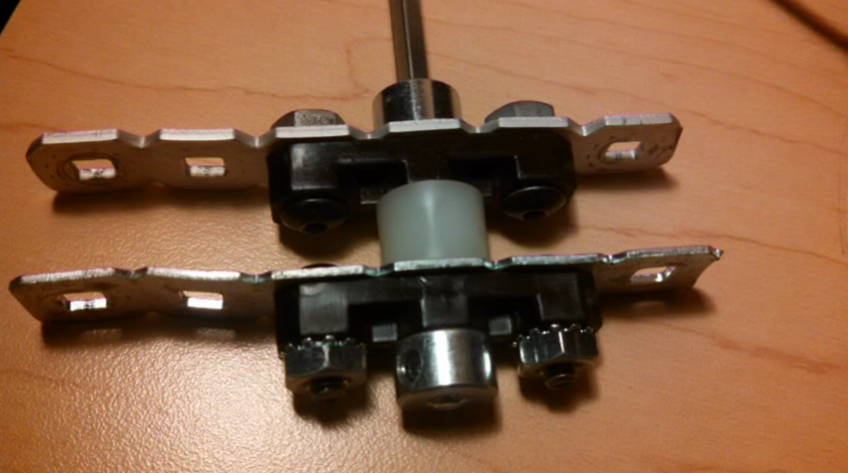
Assembly: This joint is assembled using a shoulder screw, which is seated more tightly in the metal than a conventional screw. The screw is placed through one component, followed by a washer, followed by the second component and is secured with a lock nut.

Each of the components can be seen in the model above, which are listed below:

  1. The c-channel that the joint is mounted to, which is typically mounted to the base

  2. The screw that the arm rotates around

  3. The washer that is between both c-channels, which reduces friction from the c-channels rubbing together

  4. The c-channel that is rotating

  5. The lock nut that prevents the rotating c-channel from coming off of the screw, but is not tightened down to allow the rotating c-channel to spin freely

Low Strength Axle Joint

This is a high-friction, high-slop joint which is used in applications which involve a motor or gears, since a screw joint would not be able to translate rotation the way an axle joint does.

Assembly: This joint is assembled by first securing one bearing to each component. Then, the axle is fed through both bearings, with a spacer in between, and secured using a shaft collar at either end.

Example:

High Strength Axle Joint

This is a high-friction joint which is very effective in high-torque and cantilevered (only supported on one side) applications due to the strength of Vex High Strength Axles. This joint should be used only in very high-torque operations, as it does produce more friction than a single-bearing screw joint.

Assembly: This joint is assembled by first reaming or drilling (drilling is preferred, but reaming is an acceptable alternative) a 1/4" diameter hole (or slightly larger to accommodate for wiggle) in both components, securing a high strength bearing to each. Similarly to the low strength axle joint, the axle is fed through both bearings with a high strength washer between and two high strength collars to secure it.

Example:

Contributing Teams to this Article:

Single-Bearing Screw Joint
7700R's Anti-tips

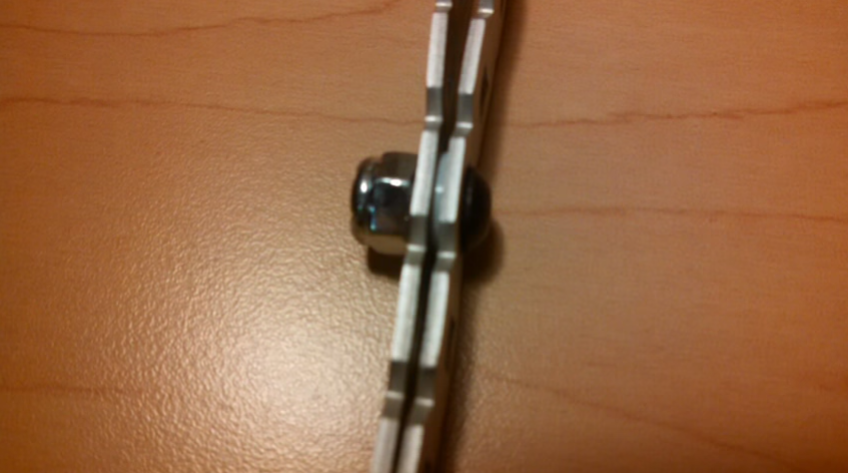
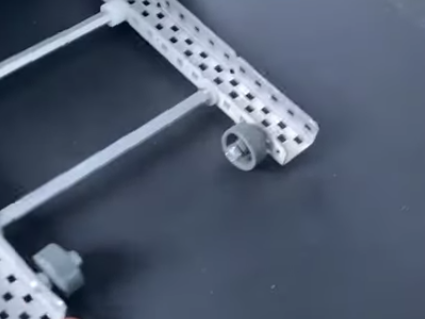
This screw joint is used to attach the rollers to an anti-tip mechanism on . Since the holes in the rollers are round, they rotate freely and with little friction around the screws.

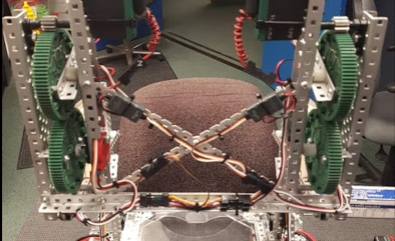
This screw joint is used to mount one bottom four-bar of . This mounting solution allows for low friction on the lifting joints, and with 12 of these joints in total, minimizing friction on each is important.

Compact Screw Joint
Low Strength Axle Joint
5225A's Lift

This low strength axle joint is used on one lower gear of . Although the other gears use screw joints to minimize friction, this one utilizes an axle to translate the gear's rotation to a potentiometer, which measures the rotation of the gear to determine the lift's height.

8066Y's Lift

This high strength axle joint is used on . Because it needed to lift several cubes, this high strength option was used rather than a screw joint. This lift also benefits from the long high strength axle connecting the two sides, thereby reducing tilt.

(Jackson Area Robotics)

⚙️
7700R's Tower Takeover Robot
5225A's In the Zone Lift
8066Y's Early Season Tower Takeover Lift
2775J
Model of a Single-Bearing Screw Joint in CAD
Model of a Compact Screw Joint in CAD
5225A's Lift
This video from team BNS highlights the main joints used in VEX
5225A's Lift